
Leg of mutton sleeve upcycle project
This project was inspired by the leg-of –mutton garments that first made an appearance in the late 1820s. Through the decades and to this day, variants of this sleeve have made regular appearances in fashion. Interestingly, the original French name for this sleeve design was Gigot which sounds romantic but still means hind quarters of an animal. Notwithstanding all this, it is a great design. It is a sleeve with impact and will definitely be noticed.
The blue Afternoon jacket in the picture is from 1895. It was made by Augustine Martin & Company. This jacket shows the standard silhouette of 1895 with the sleeves heavily puffed at the top and a form fitted bodice. The subtle color variations and intricate embroidery emphasize refinement.


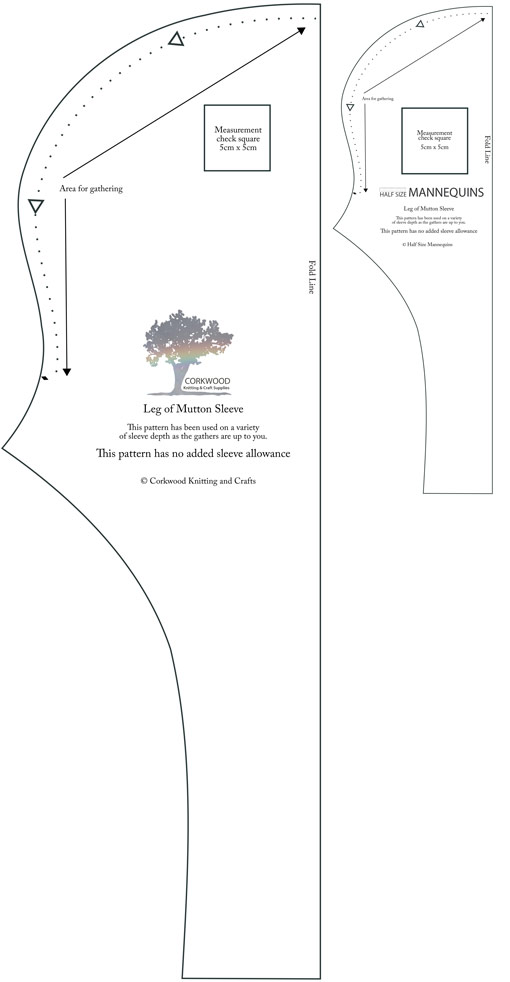
I’ve had a lot of fun with this sleeve. I did create the shape on one of our half size mannequins before I started the full size version. I’ve provided a link to the full size and half size pdf sleeve pattern at the bottom of the page. I have used this pattern in a few of my upcycling projects both half size and full size. It’s an incredibly versatile shape. Because of the gathers, it will fit into sleeve depths from approx. 8 to 10 inches. If you need more gathers just increase the height of the sleeve cap on the paper pattern until you achieve the fullness you require.
Points to be aware of with this particular sleeve pattern. As it’s a close fitting sleeve at the wrist, you may have to check what you need and maybe adjust the width here for a correct fit.
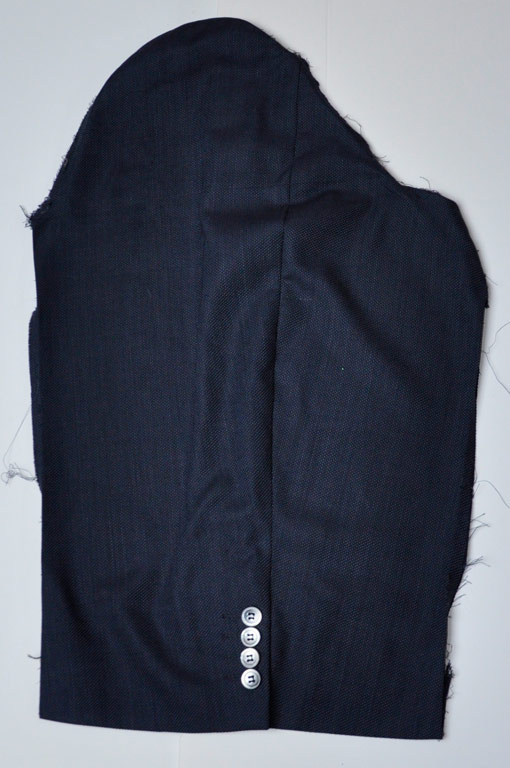
The suit I used was a single breasted charity shop man’s suit. Our one was made of nice wool worsted. I wanted to keep a slightly androgenous feel to it, so made no other adjustments to the body. It helped that it was a smaller mans size otherwise I would have had to make other adjustments.

The original jacket sleeve was first removed from the jacket and the sleeve seam on the sleeves was opened up so the sleeve fabric could be laid out flat

The paper pattern was split with a diagonal cut like the next picture. It could be cut many different ways but I thought this would be visually appealing.

The bottom section of the paper pattern was laid on to the sleeve fabric like the picture below. Remember if there are button sections involved, to cut out the shape as opposites. You don’t want two left hand sleeve sections.

The top section of the paper pattern is cut from sections of the trousers. The trousers were separated from the crutch seam to make two halves and then each of the halves was opened up by taking out the inner leg seams. How the top sections of the separated paper pattern are laid on to the fabric is a personal decision as there are various ways you could do this. We cut ours to maintain the pocket sections. (Remember again to make both sides as opposites).

The top and the bottom of the sleeve fabric are then re-joined so the shape will be the same as the full paper pattern again. I marked the centre of the sleeve to match the shoulder seam and ran a loose sewing stitch over the area that was to be gathered. I secured the sleeve at the centre point and then gathered the fabric until it fitted in the sleeve hole one side at a time. I hand tacked the sleeve in so I could check its visual appearance and when I was happy with it I machined the sleeve in.

In order to create some stiffening, I cut the same sleeve shape out of some upcycled stiff lining fabric and after gathering the cap in the same way as I had done the with the outer fabric, (but not splitting the paper pattern like the outer layer.) I attached my new sleeve lining to the lining of the jacket. This required a bit of hand stitching but didn’t take too long.
There is I’m sure plenty of other ways to do this project. I am relatively new to the world of sewing. I’ve spent over 20 years working in knitwear production, but of course this uses different machines and processes. This does prove that lovely things can be made with relatively little experience.

For anyone interested I have provided a free to download link to pdf files for both the full and half scale sleeve pattern.
Printing advice for our downloadable pdf files
When printing out these patterns remember to print out at actual size and turn scaling off. Print using the poster command and tick the box for cut marks as this makes it easy to join sections of A4